YARD ART
define the problem
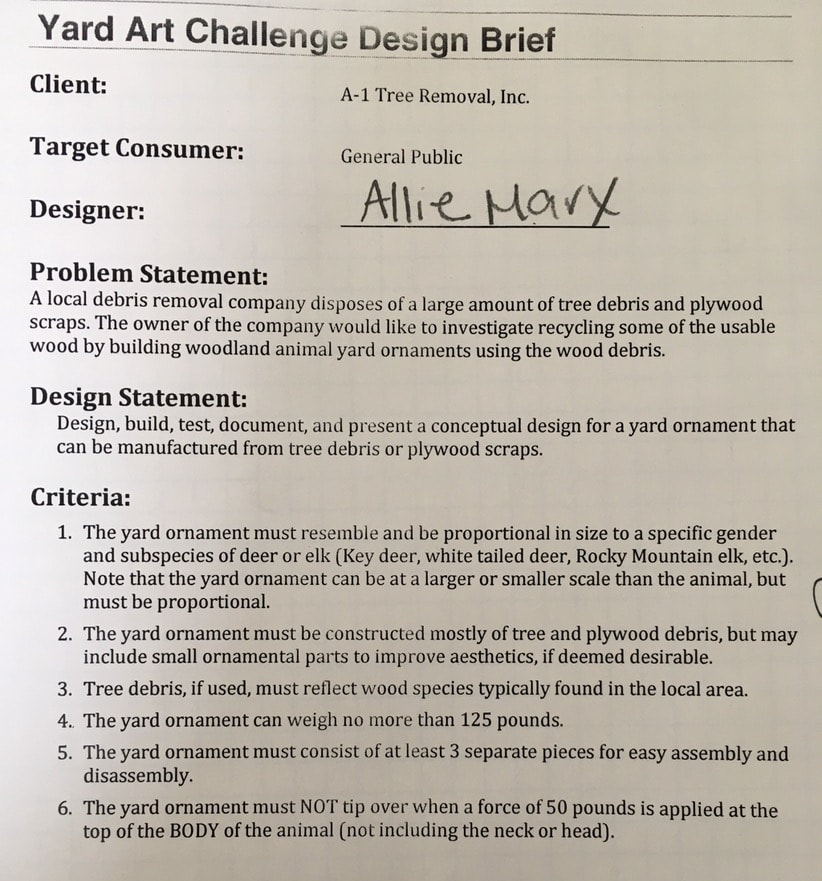
generate concepts
|

|
develop a solution

construct and test prototype

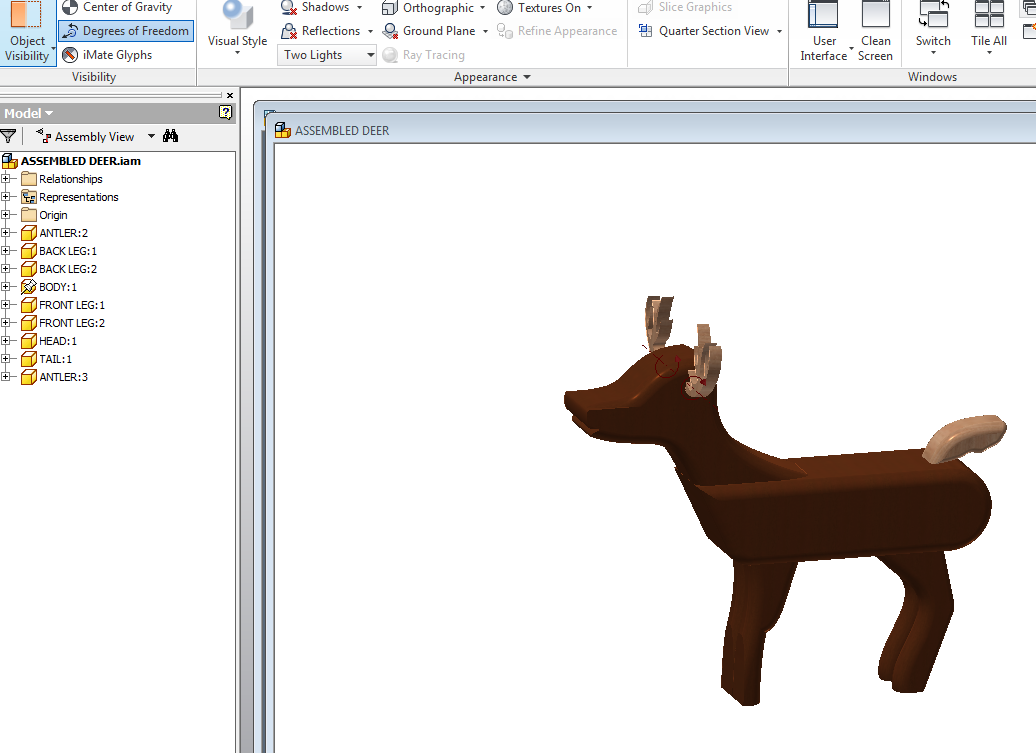
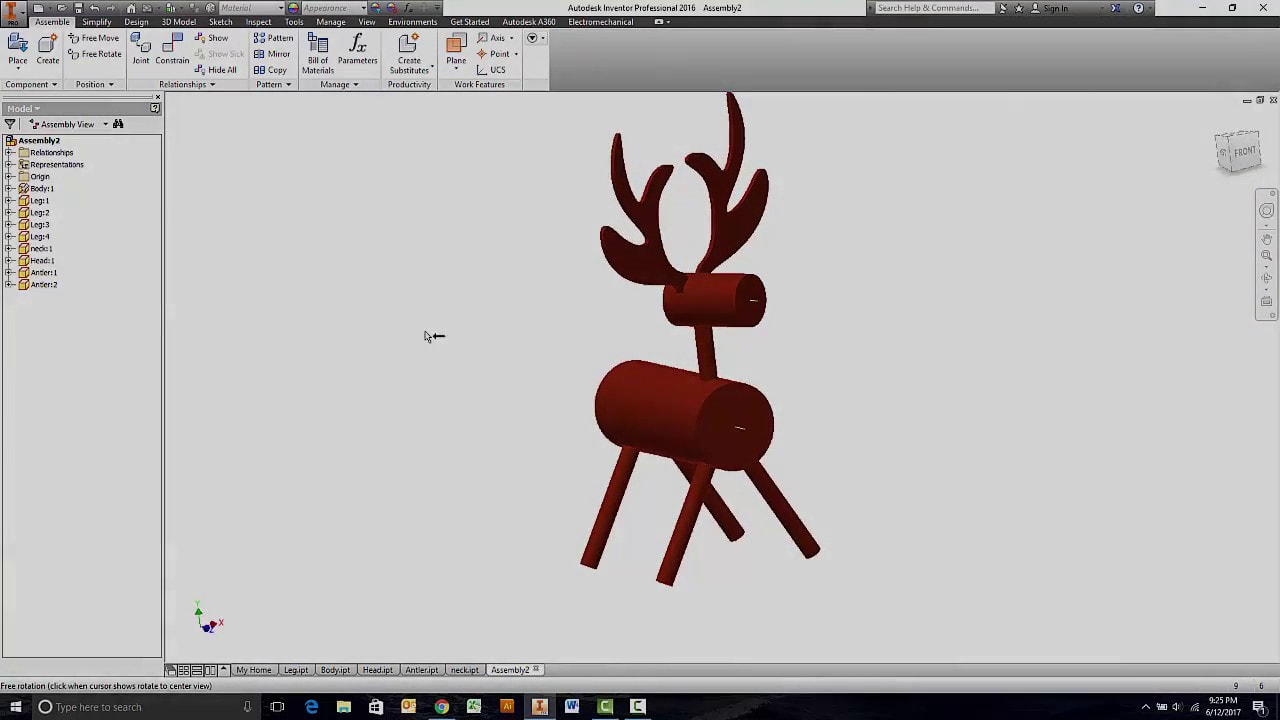
In order to constrain all of my parts together I used the mate and insert constraints. To attach the head, front legs and back legs to the body I mated 2 vertexes of each part to the body, this limited all of the transitional and rotational degrees of freedom. To mate the 2 antlers and the tail to the deer, I used the insert constraint. By adding 1 inch pegs to the antlers and the tail, and making holes in the head and the body I was able to connect the parts. I was able to constrain one vertex of the tail to the body which limited all of its degrees of freedom but the antlers were still able to rotate within the hole, therefore they had 1 rotational degree of freedom.
evaluate the solution

My final solution was a deer that weighed 118.952 lbs, which was within the design criteria of weighing under 125 lbs, but it could only withstand 16.32 lbforce. 16.32 lbforce<50 lbforce.

In order to make my deer withstand the 50 lbforce I redistributed the location of my tipping force to be the center of gravity. Also, I changed the dimension of my width from 5 inches to 13 inches, the distance form the tip of the antler to the center of gravity. Using the equation to find the tipping force (WEIGHT X DISTANCE TO COG)/ HEIGHT, I found my new tipping force to be 51.41 lbforce. If I could redesign my deer I would make it shorter, but increase the depth. By having a wider base the deer would have more stability against the tipping force.
present the solution
I am very proud of my final design solution, I spent a lot of time trying to make my deer very realistic and proportional, while staying within the design constraints. I do believe a company would mass produce my design being that it fits all of the criteria and is a feature that people would want to buy. While creating my deer I used tools that were new to me as well as the tools we used daily in class, I used the spline tool for every part which I think helped make it very realistic. Also, I used the shell tool to hollow out a few of my features to make them lighter and stay under the 125lb limit, and when assembling my deer I used the Insert constraint to place the antler, or tail peg into the holes. These new tools helped me make an efficient deer and now that I know how to properly used them I will be able to used them in future projects. Creating my deer sketch on the grid plane helped to keep all of my parts proportional, and keeping my parts level so I would know where my COG would be. The grid allowed me to create my sketches and extrude them, but I also went back on a few of my parts and used the additive and subtractive methods of re-extruding them or creating holes in them to fit the criteria and make my assembly complete. Overall my second inventor project experience was a whirl wind, having such limited time made me very stressed, as well as having all of my parts be deleted. But the pressure of the time did help motivate me to find solutions to my problems and think outside of the box. Although it is a hassle trying to teach yourself the ways and tools on Inventor it will benefit us in the long run and it did teach me patience, and how to used your resources to make something out of nothing.
